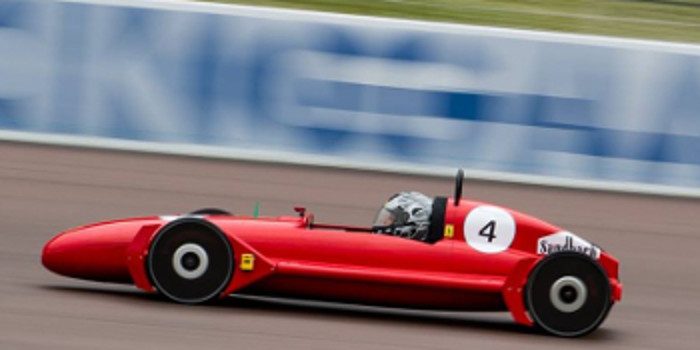
Dylan (2015)

Dylan
International final winner in 2016. Dylan is the latest car from Sandbach High School. Dylan saw his first race action at Croft in 2015 and managed to collect a couple of 2nd places, including a 2nd place at the International Finals that October. It was however only at Rockingham in July 2016 that Dylan received his full `Faux-rrari’ race livery and all the technical developments that the team had planned for him.
Dylan was in development for a very long time with initial plans first drawn up in 2013. The team wanted to make the most of the opportunity to understand the new 2013 rule changes and so spent a great deal of effort developing and testing ideas on Dougal in order to evaluate their effect on Dylan. Once the team were happy with the shape of the proposed car construction could commence.
The first step was to make a buck to mould the glass fibre around. The buck is made from foam. Due to the size and complex shape of the cars it is impossible to make the foam buck in one piece. It is necessary to make the shape in slices which are then individually cut to shape with a CNC router, they are all stuck together to make the car shape. It is useful whilst making the slices to identify which one is which. If they are glued toether in the wrong place it would be possible to end up with an unusual shaped car!
Once all the foam shapes are glued together, the shape sanded to smooth out any imperfections and it was then painted to ensure that the foam was protected. The buck was then covered with a coat of epoxy, The buck was made out of foam and if left unprotected would react with the polyester used to make the carbon fibre mould. The mould was then coated in PVA to act as a release agent.
When the mould was ready it was all go. February half term was too cold to work outside so the buck was moved into a classroom so that work on the mould could commence. Getting the mould inside was a bit tricky but it was soon in place and ready for work to start. The buck was covered in chopped strand mat and wetted out using polyester. The glass fibre mould is very thin so to ensure it maintained its rigidity, foam ribs were placed at regular intervals along the mould and then covered in chopped strand mat and polyester so they became part of the glass fibre mould. The glass fibre is then left to harden for several weeks until it has fully hardened.
The glass fibre mould was fully hardened and it had to be released from the foam buck. Water was used to dissolve the PVA release agent so that they could be separated.
As this is a complex shape we split the mould into 5 different sections: two for the nose, two for the top bodywork, including the tail section, and one for the bottom of the bodywork. These are bolted together so that we are left with 3 separate pieces: nose, top and bottom.
We applied the carbon fibre and wetted it out using epoxy. Two layers were wetted out, then a layer of core material and then another 2 layers of carbon fibre were wetted out. This was quite messy and we found that there was a lack of consistency in the application of the resin in different areas, with different users so we had some very wet areas and some quite dry areas. This means that we might have used more epoxy than required in some areas and not enough in others which means that we had to wet out some of the areas a second time. The other issue with a wet-lay-up is that once you start you cannot stop until the mould is fully wetted out and bagged up and vacuum started. This can be quite time consuming so was there an alternative option for applying the epoxy?
After we had wetted out the carbon fibre we put it all into a big bag and applied the vacuum pump to suck out all the air and create a vacuum. This was left for 24 hours and then the vacuum was switched off and the bag removed. The carbon fibre was then left in the mould to harden for several weeks.
.

